Getting Started with Membership
By PluginsCorner
Tutorial
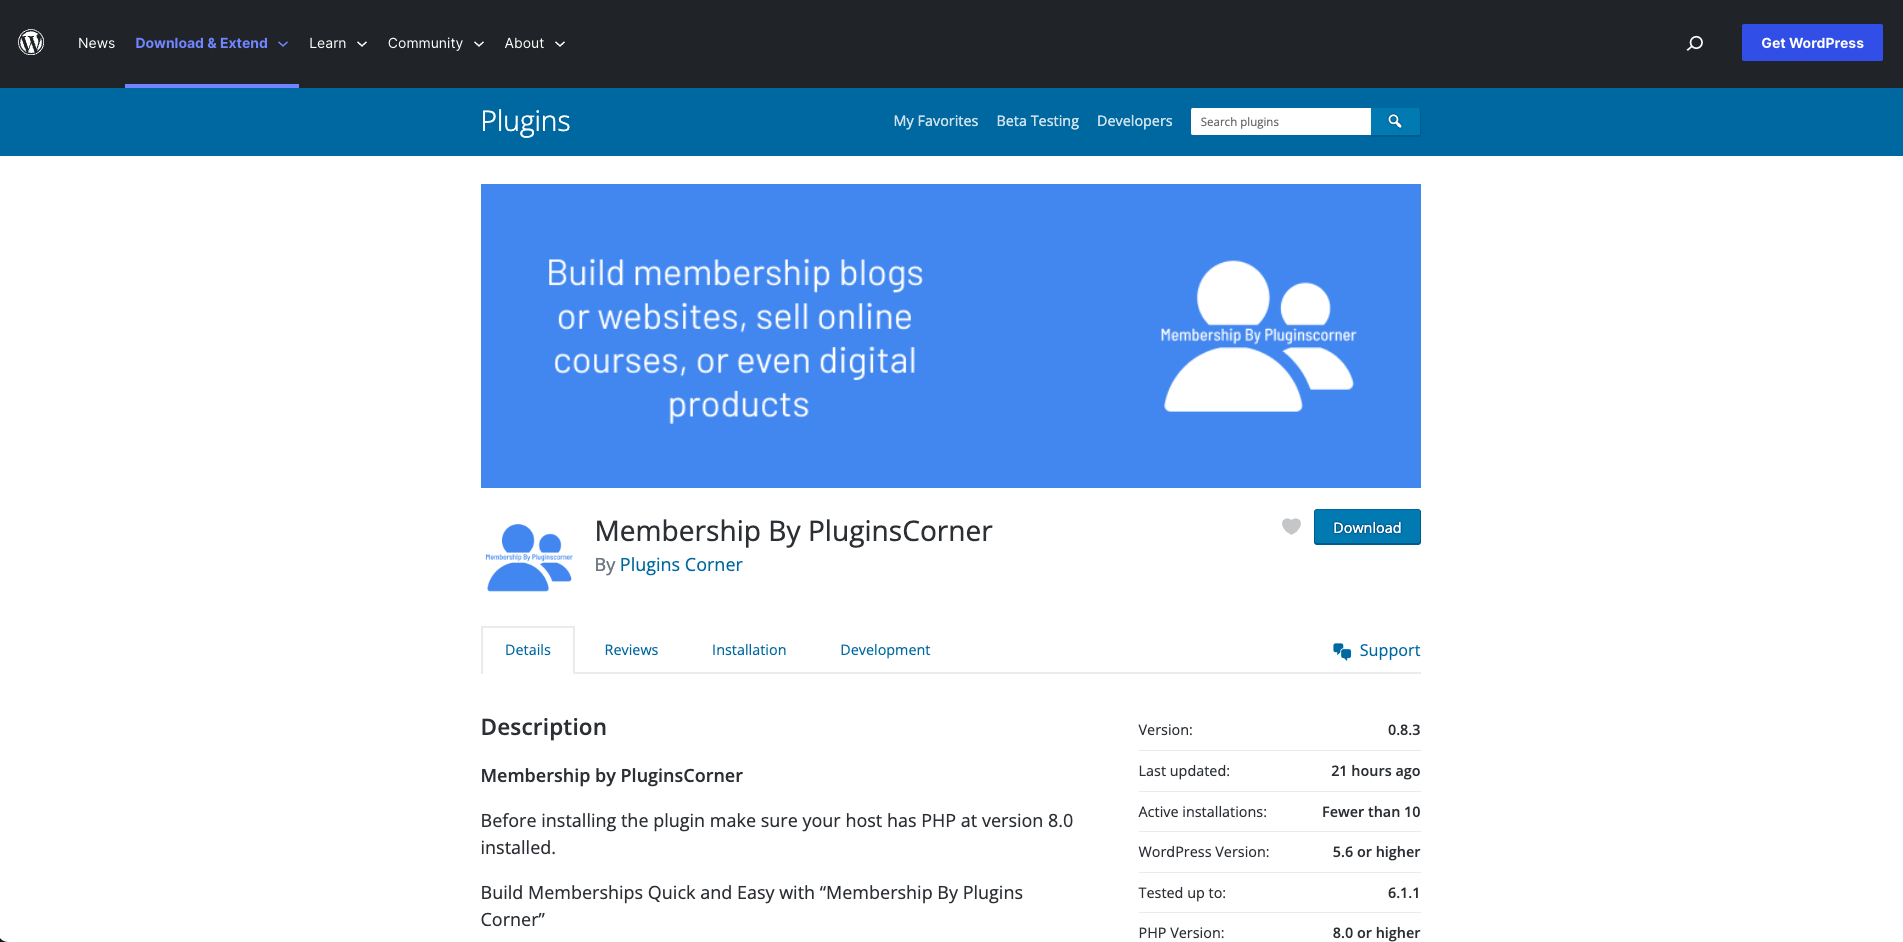
Installing the Free Version
To install the free version download Membership by Plugins Corner in the WordPress Repository and download it.
Once downloaded navigate to your plugins section and upload the downloaded zip to your plugins and Activate it.
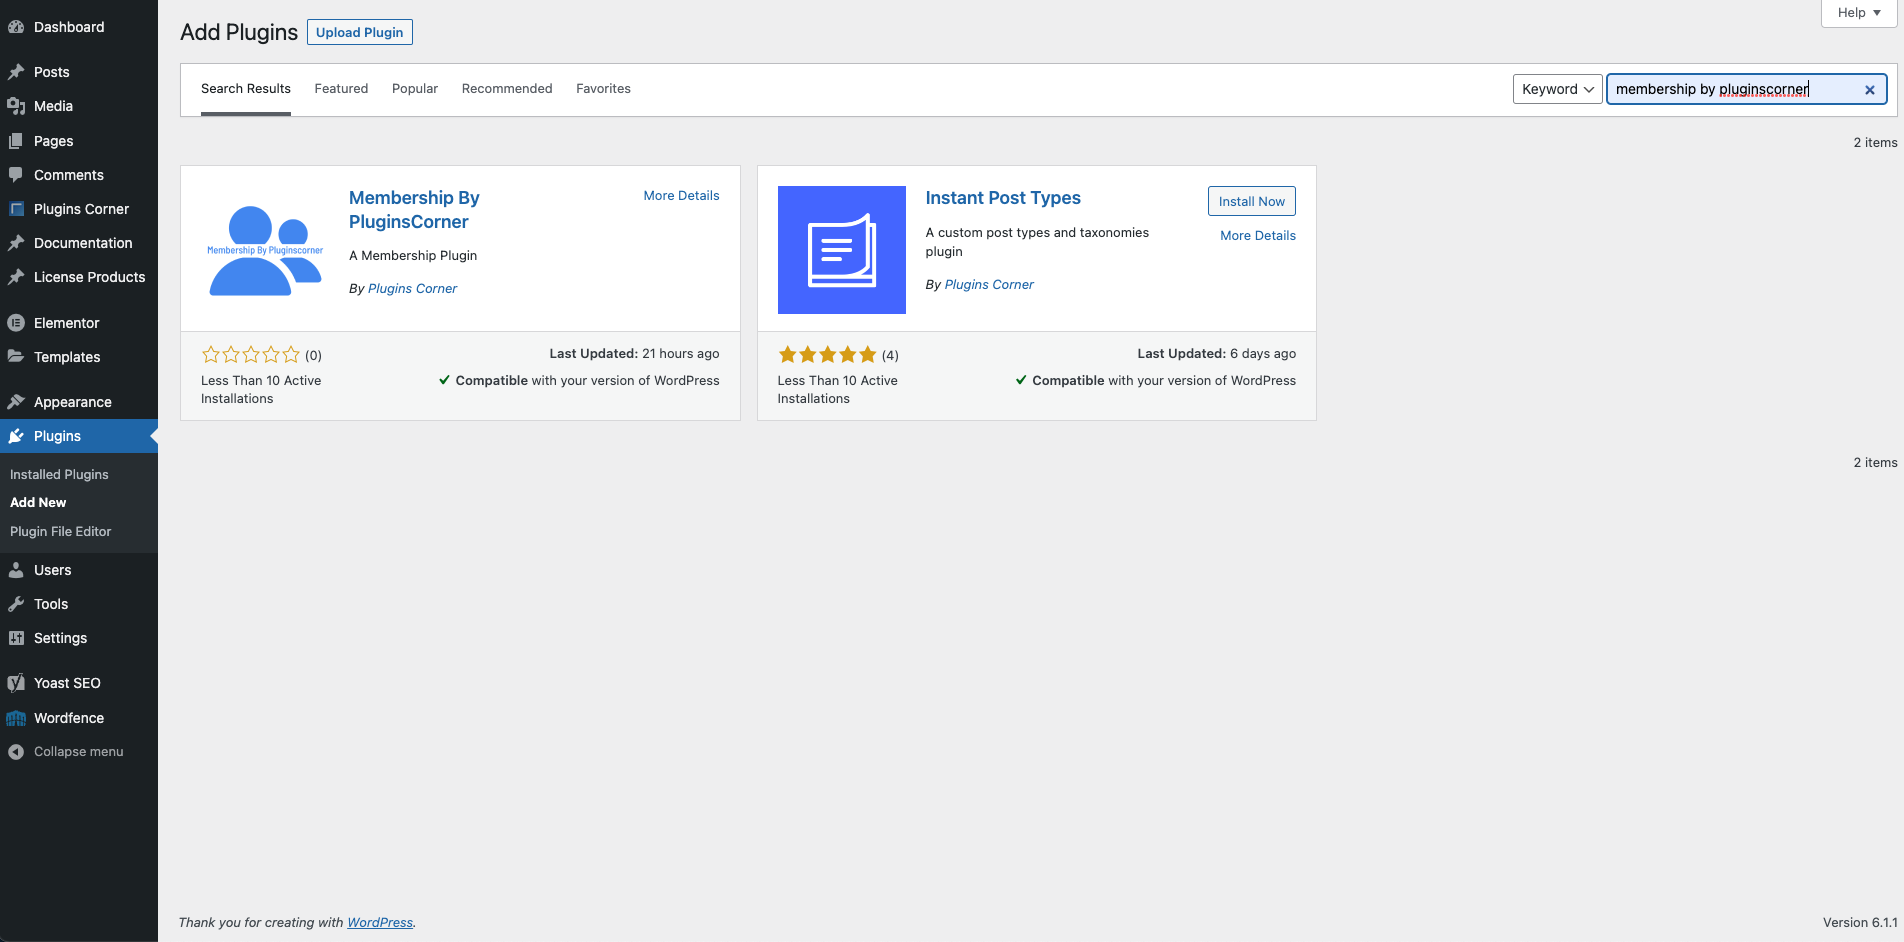
Alternatively you can go into your plugins section and search for “Membership by PluginsCorner” and install and Activate the plugin from there.
Getting Started Guide
Once the plugin is activated a pop-up window will appear with a guide for you to get started with setting up the plugin. You can Skip the guide if you’d like to but in order for you to get set up correctly we recommend doing the Guide. At first some information regarding what you’ll be doing in the guide is offered.
Note: Once you started the guide, not all steps are mandatory and you can skip some steps, but in order for the plugin to function correctly membership and payment methods should be created. You can always set these up later in the Membership Levels and Payment Methods Tabs in the plugin administration panel. Tutorials to achieve this in the panels: Creating a Membership Level , Setting up payments with Paypal or Setting up payments with Stripe

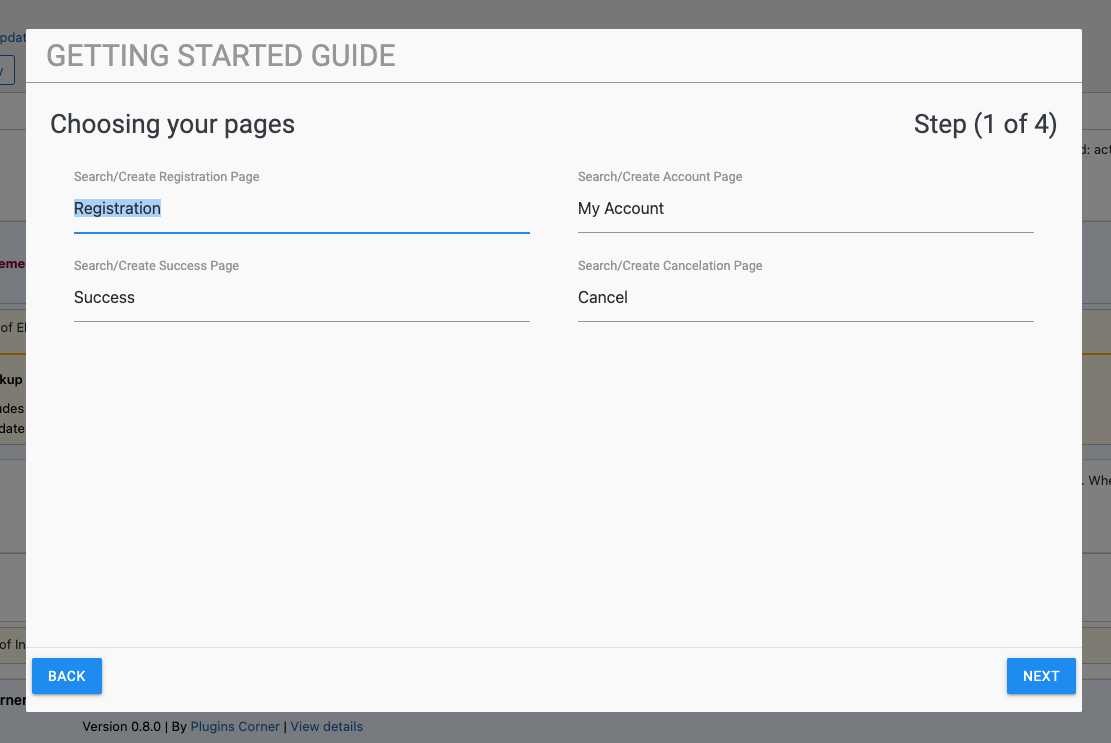
Step 1 (Choosing your pages )
Membership by PluginsCorner requires 4 pages to be created in order to function properly. These pages are:
- The Registration Page, which is the page users should visit to register for a membership. Within this page the plugin will add the Registration Form Shortcode ( see the Shortcodes tutorial for more information regarding the available shortcodes).
- The Account Page, which is the page where users can manage their account. Within this page the plugin will add the Account Form Shortcode.
- The Success Page, which is the page where users get redirected once a membership is purchased. A default success message is added to this page by the plugin which you can customise to your linking once everything is set up.
- The Cancelation Page, which is the page where users get redirected once a membership is canceled. A default cancelation message is added to this page by the plugin which you can customise to your linking once everything is set up.
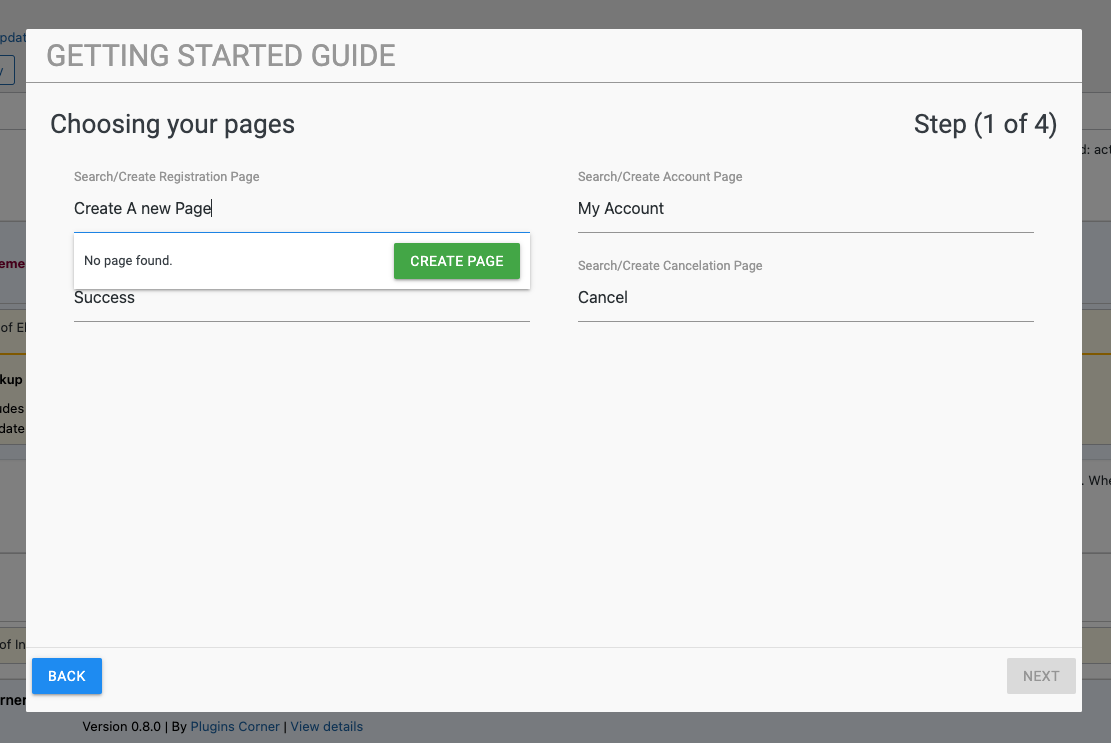
Note: You just need to start typing the pages names. If pages exist wit the names you want you will be shown a list of them to choose which one you want to use. On the other hand if no pages exist with the names you want then a Create Page button will appear (see screenshot below) which will create the page for you.
Once all pages are set up the Next button will be enabled and you can continue to Step 2 (Miscellaneous Settings)
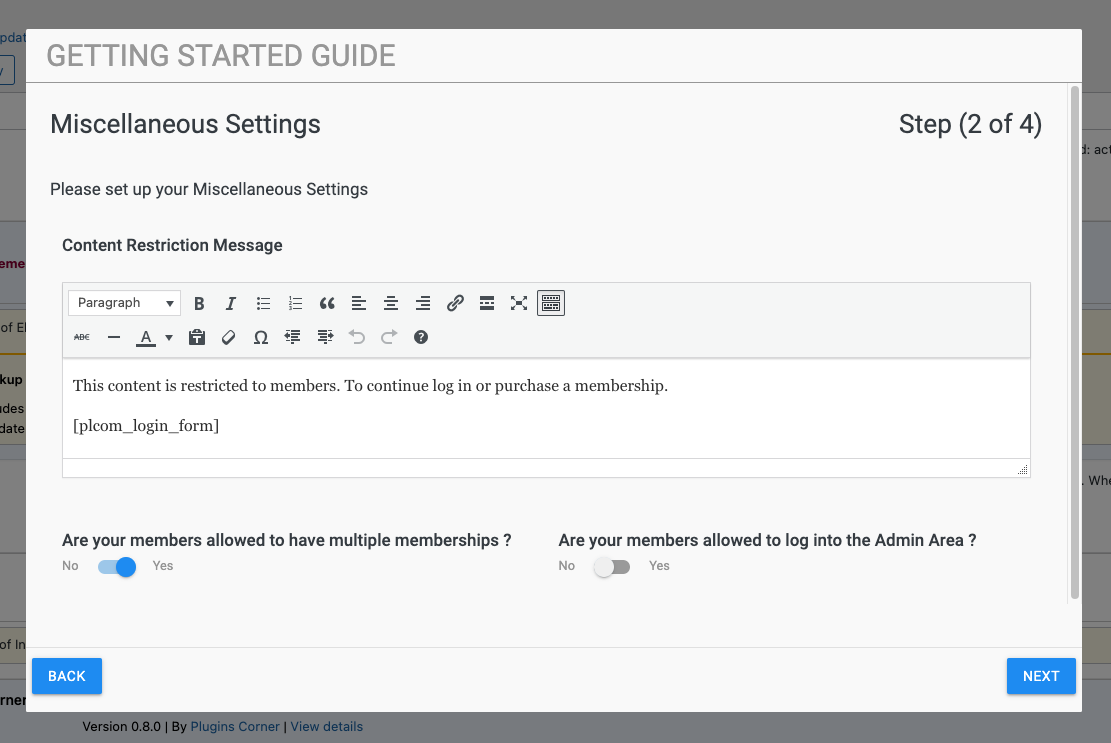
Step 2 (Miscellaneous Settings)
In the Miscellaneous Settings step you will be able to set up some general preference Settings.
- The Content Restriction Message. This is the message displayed to users that are not logged in or members users who don’t have the correct permissions to access this page. Membership by PluginsCorner offers a generic message by default along with the Login Form Shortcode to offer not logged in users the chance to login in order to access the page. If you want to change this message you can do it in the WYSIWYG Editor
- The Allow Multiple Memberships option. Depending on your Business Model you may want users to be able to register for multiple memberships (for example if you sell licenses and you’d like the user to buy multiple ones). By default this option is disabled
- The Admin Area Access option. By default members with memberships will not be allowed to access the WordPress admin area, but if your Business Models requires access you can enable this option
Note: The plugin has a multitude of settings. These are just some general ones which you can set up. In order to see what setting you have you can check out the Settings tutorial or you can navigate to PluginsCorner -> Membership -> Settings
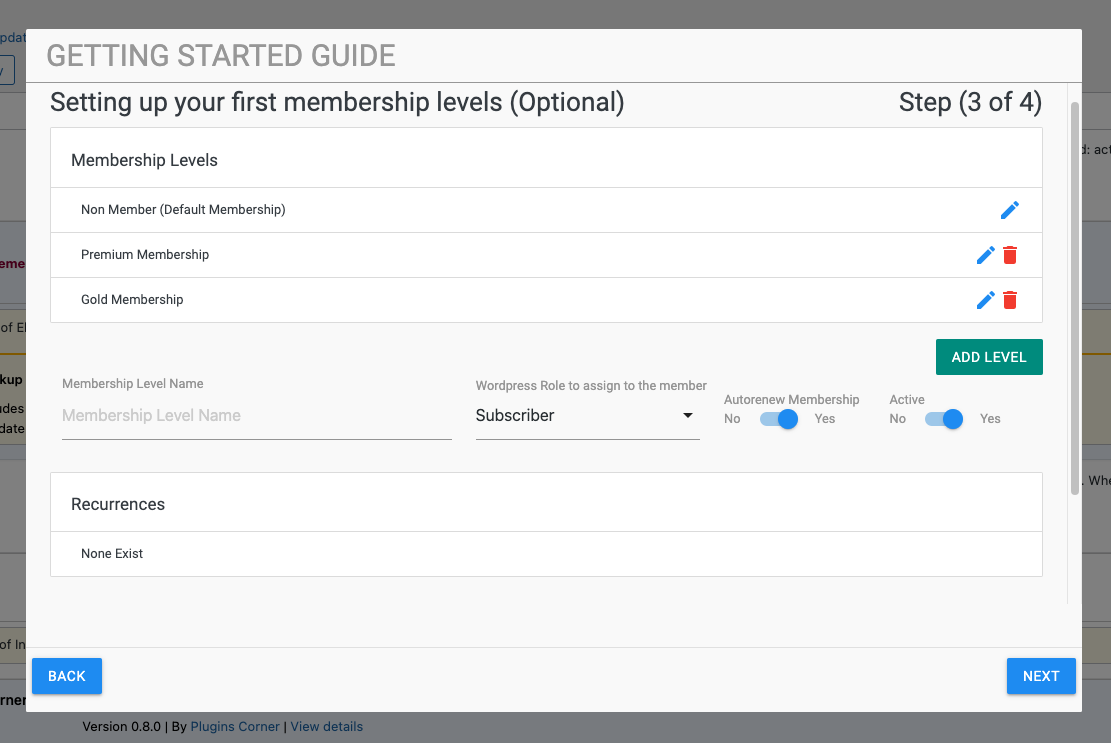
Step 3 (Setting up Membership Levels)
In the Membership Levels step you will be able to set up your first Membership Levels. This Step is Optional.
When you get to this step you will find out that a “Non Member” Membership Level already exists. This Level cannot be deleted and no recurrences can be added to it. This is the default level new members will receive once they register until the payment is processed by the plugin. This Membership Level can also act as the “Free” level if you want to as the level has one Free recurrence.
Once the Add Level button is clicked a form will be shown with the available options.
- The Membership Level Name option is the name which the membership will have. This is also what will be displayed in the Registration Form when a visitor tries to purchase memberships
- The WordPress Role option will allow you to choose which role the new member will be assigned. You can define your own roles in the plugin settings (see the Creating Custom Roles Tutorial)
- The AutoRenew Membership option (enabled by default) will allow the plugin to auto renew memberships. In case you want memberships not to autorenew you can disable this option
- The Active option. In some cases you may want to disable a membership. For example you want to change prices or want to create a better offer for other members which will replace the current offer. When a membership is not active it will not be shown in the Registration Form nor can it be purchased in any way. If a Membership Level is deactivated it will not affect the current members. Payments will continue to be processed for existent members, but no new members can be added to this Membership Level while Inactive
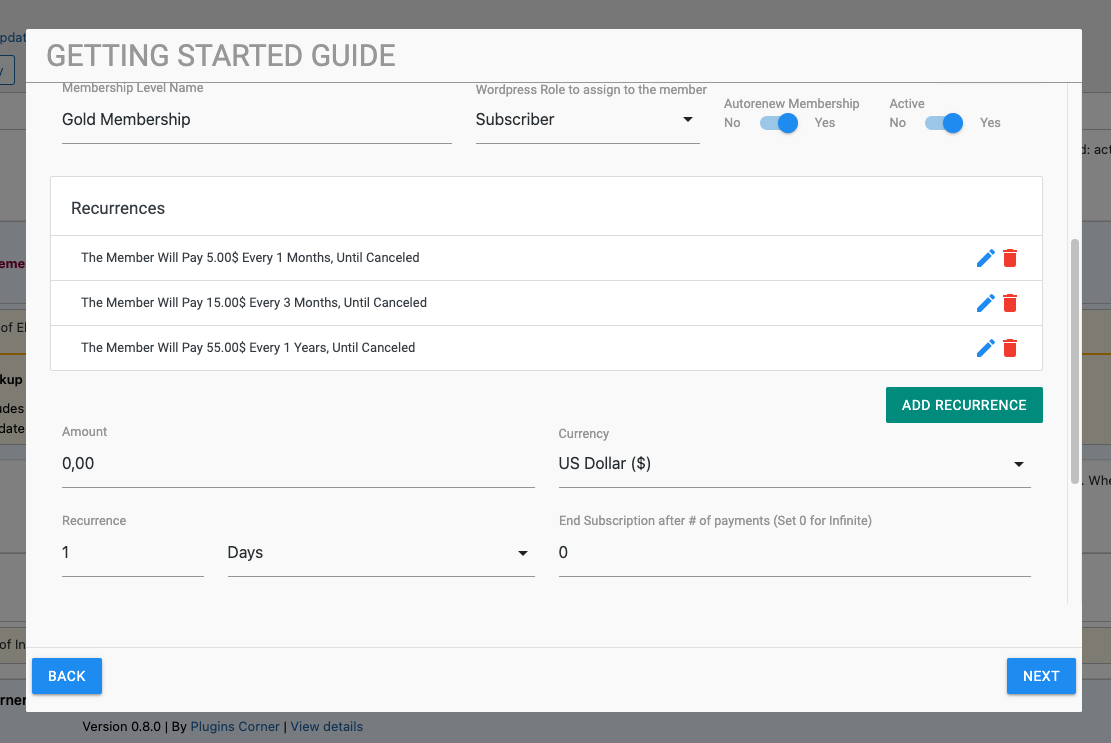
The Recurrences Section will allow you to add an infinite number of Recurrences. A Recurrence is defined by a set amount of time that needs to pass in order for the membership to be renewed. For example: A user can subscribe for a Membership and pay every 30 days. But maybe you also want the same membership level to be available for 3 months payment or even a yearly payment. Well this is where Recurrences come in. You can define as many as you like and they will be displayed in the Registration Form along with each membership level so potential subscribers can choose which option fits them best. You can define the following for any Recurrence:
- The Amount you want to charge. If you want to offer a free subscription you can just leave this at 0.
- The Currency you want to receive in your payment gateway.
- The Recurrence Itself which is the number of cycles which can be 30 Days or 3 Months or 1 Year as examples. The combination of number / Days / Months / Years gives you the freedom to customise your recurrences to your needs
- The End Subscription option offers you the possibility to offer a membership for a finite period of time. This option works together with the Recurrence option which defines the number of Cycles the new member will go through before the Subscription Ends. 0 means it’s infinite and the subscription can only be closed by you or the member who purchased it
Step 4 (Payment Methods)
If you want to charge users for their Memberships then you have the option of receiving payments from Payment Gateways. All Payment Methods are API integrated to work so you will need to set up your API keys and your IPN (Instant Payment Notification) URL in order for the payments to work.
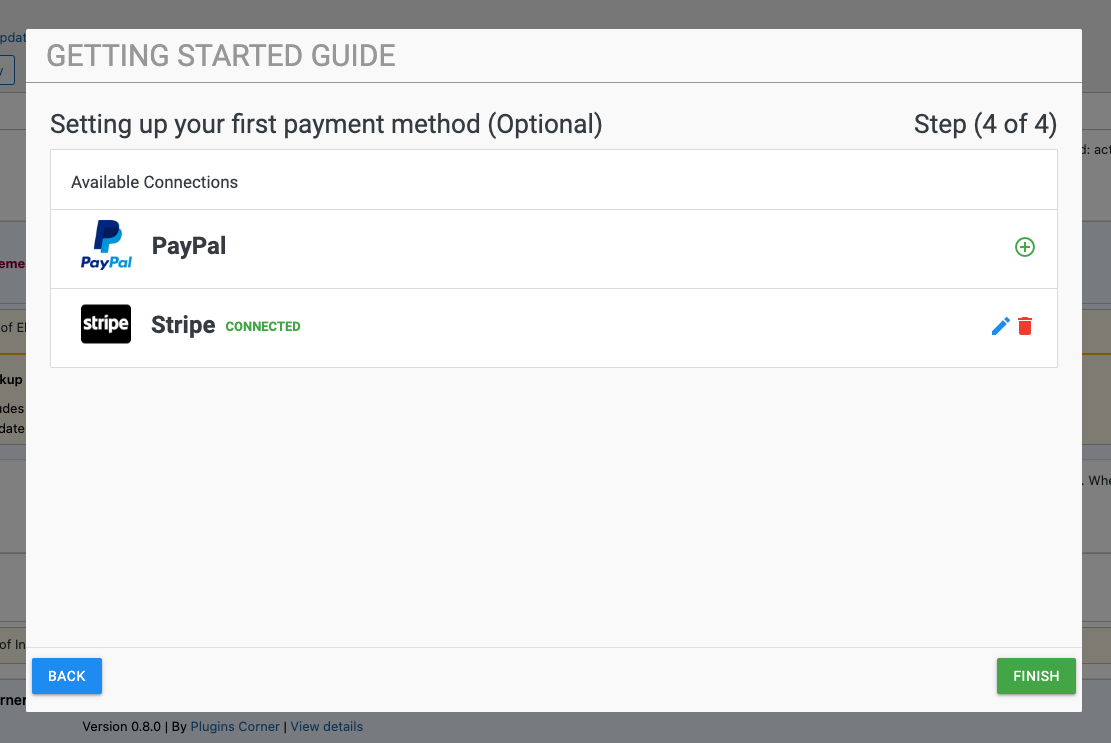
All Payment Methods differ in one way or the other so please check out the documentation for each payment method to help you get going with each one. For example for PayPal, Membership by PluginsCorner requires your API Key and your API Secret Key (If you want to test things out you can enable Sandbox Mode and you should put the Sandbox Keys instead of the Live Keys). When keys are added and the Connect button is clicked, Membership by PluginsCorner tests this connection to make sure the plugin can comunicate with the payment method. Only if the test succeeds the connection is added, otherwise you can open a support ticket so we can help you out with your connection Setup
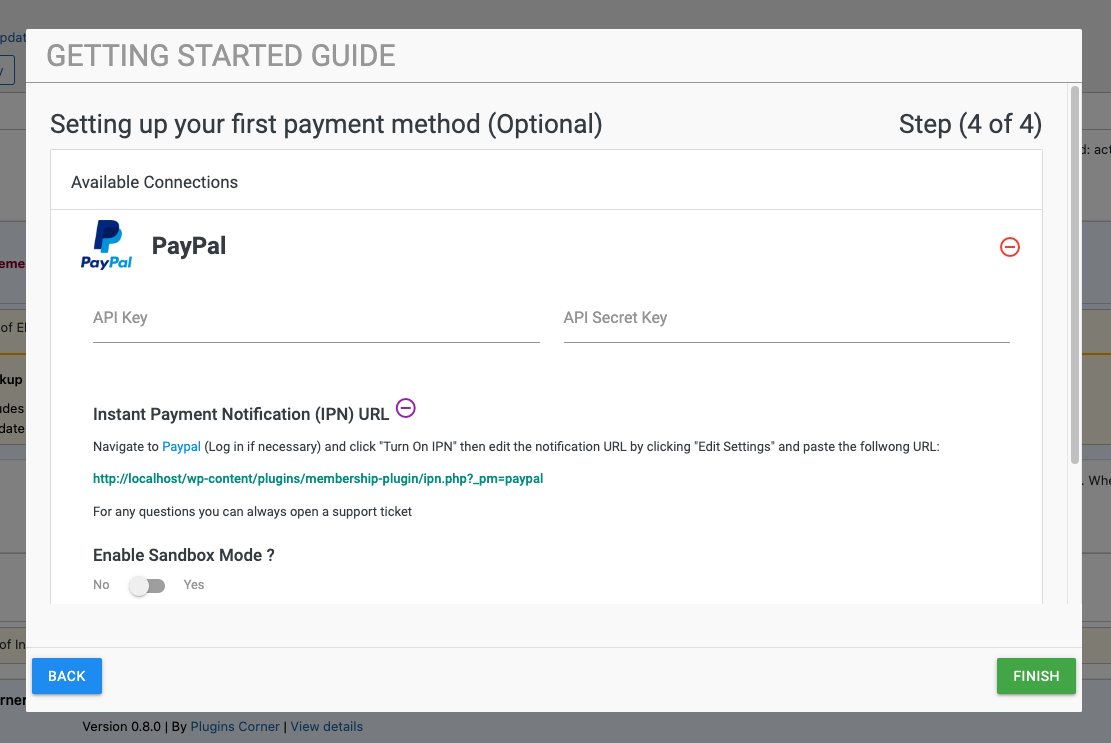
Note: For Payment Methods which have a Sandbox Mode option the connection will fail if you enable the sandbox option and you use the Live API Keys. Please be careful which keys you use
That’s it, you can now click Finish to Close the Guide.
Congratulations ! You are now ready to receive payments with Membership By PluginsCorner. Follow along with other tutorials to learn more about the sections of the plugin.